


 Chris Hedges
2 min read
Increase the efficiency of your electric underfloor heating system
When installing ThermoSphere electric underfloor heating using insulation board will minimise downward heat loss and maximise the efficiency of your...
Electric underfloor heating is a simple and effective heating system to install in both retrofit and new build projects. Any competent DIYer can do it. However, you must get a Part P registered electrician to make the final connection of the underfloor heating system to the mains. It is also worth asking your Part P registered electrician to advise you if the load of the system exceeds the 16A maximum load of the thermostat. If it does, you’ll need to install a contactor/snubber.
In this guide we will walk you through each stage of the installation process, including some top tips, when installing an electric underfloor heating mesh mat system such as ThermoSphere Mesh at 150W/m2.
For the purpose of this article, this guide will focus on installation of the system in an upstairs bathroom which has a timber floor and will be finished with either tile or stone.
Prefer to watch the video? Watch ‘The complete guide on installing ThermoSphere Mesh’.
Consider this your checklist before you start your installation. We’ve also included some useful tools.
|
The UFH Bits! |
Standard Tools |
Tilling Tools |
|
Electric underfloor heating mat(s) Thermal insulation boards Perimeter insulation foam Screws and washers Flexible tile adhesive Self-levelling compound Fixing tape Fibreglass mesh tape Conduits Floor sensor Spare floor sensor Electrical back box Thermostat Your chosen floor finish |
Wire cutters Wire strippers Scissors Sharp blade Screwdriver Precision screwdriver Marker pen Electric meter |
Mixing bucket Large notched trowel Sponge Tile cutter Tile spacers/levellers Mixing attachment and drill |
As we are using the example of an upstairs bathroom, the substrate will typically be plywood or timber. If you are installing electric underfloor heating downstairs, it’s more than likely you will have a concrete substrate.
Why does the type of substrate matter?
It’s because you will need to use a coated insulation board for a timber substrate and an uncoated insulation board if it was a concrete substrate. In order to maximise efficiency of your underfloor heating system, we always recommend allowing for insulation board as it will increase the efficiency of the system by up to 50%. This means that the room will reach the desired temperature faster and it will cost you less to run.
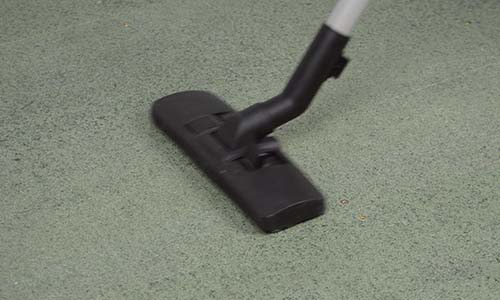
Back to the subfloor preparation. Make sure that the sub floor is level, stable, clean and free from any dust or debris. Fix the perimeter insulation foam around the edge of the room using the self-adhesive strip or any strong double-sided tape.
Loosely lay the coated insulation boards (to be used with timber substrate) in a brickwork pattern over the whole floor. Use a knife to cut boards to fit your space.
Fix the insulation boards to the substrate at 300mm centres, with screws and washers. You can also use mesh tape along the seams which helps the adhesive to stick over the joints.
When installing over a concrete substrate, make sure it is clean, level and ready for tilling. Trowel out the tile adhesive and lay uncoated insulation board over the whole floor.
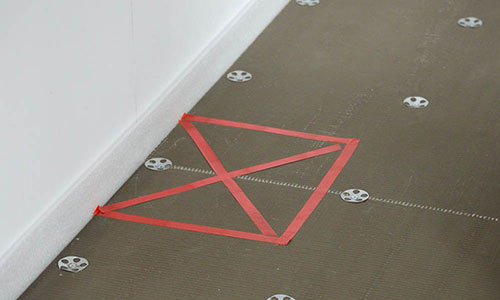
When installing your electric underfloor heating system in your bathroom, you will need to mark out the areas where there are (or will be) permanent fixtures such as toilets, pedestals and baths.
If you install permanent fixtures over heating cable you will restrict the airflow to the floor which causes ‘thermal blocking’. This can cause the heating system to overheat, damage the floor finish and fail.
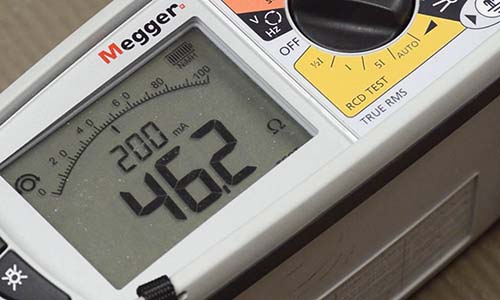
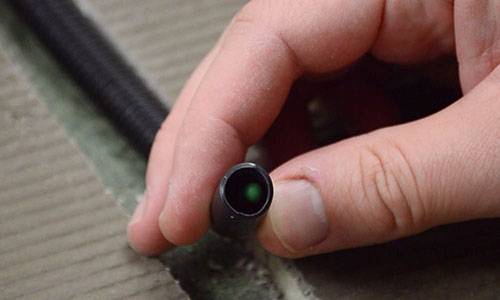
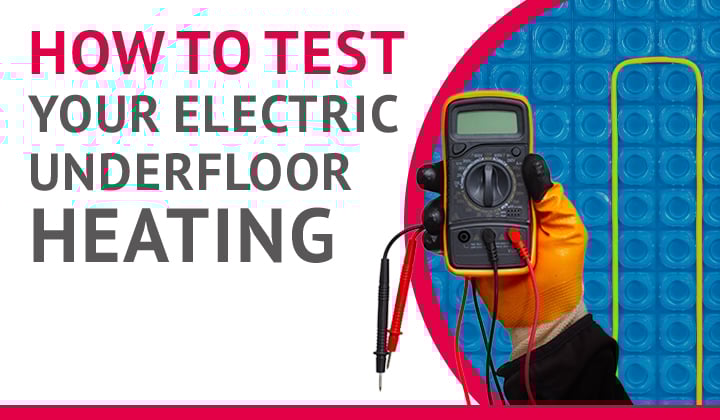
Testing is one of the most important things to do. Imagine turning the electric underfloor heating on for the first time and it doesn’t work…heart-breaking. This is the first of three tests to complete. You will also need these readings to register the system warranty with the manufacturer.
Testing the heating mat:
Testing the heating mat insulation:
Floor sensor resistance test:
Now the first phase of testing has been completed, the next stage is installing the mesh mat.
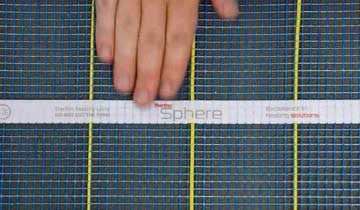
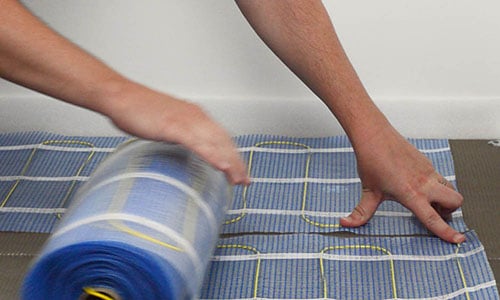
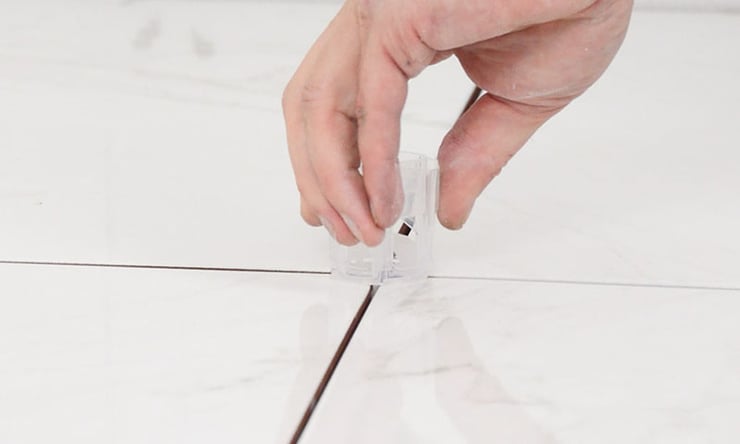
It’s best to start near to where your thermostat will be positioned and roll out the underfloor heating mat. When you reach an obstacle or the end of the room, carefully cut the mesh using scissors. Important: Don‘t cut the cable and don’t use a knife to cut the mesh mat.
Once the mesh has been carefully cut, rotate the roll 90 degrees and arrange to avoid the marked unheated areas. Continue rolling out the mat to the next unheated area. This section of mat is wire side up. When you reach the wall carefully cut the mesh, flip the roll over and continue rolling in the opposite direction. Simply repeat these steps until the whole floor is covered.
For smaller areas you can remove the heating cable from the mesh matting. You do this by carefully cutting the mesh, peeling off the protective film and removing the white tapes. Put the mesh to one side to use later. Make sure you have enough heating cable to cover the heated area. For narrow areas, cut the mesh into strips and remember to not cut the cable! You can then lay the strips in a line.
Securing the loose heating cable
When securing the loose section of heating cable from the mesh mat, make sure to space the cable with a minimum spacing of 50mm.
When positioning, don‘t cross the heating cable and don‘t use fixing tape over it. This will cause overheating and cable failure. Use mesh tape to hold loose heating cable in place. This prevents air voids and allows full coverage of tile adhesive and move any screws and washers which sit beneath the heating cable. Use the cutaway section of the mesh mat to cover and protect the heating cable.
After you have finished laying the mesh mat, it is now time to run the second set of tests. You run both mat resistance and mat insulation test again to ensure that no accidental damage has been caused during the cut-and-roll process.
Head back to point 4 for a recap on how to run these tests.
Installing a floor sensor helps you to limit the floor temperature and reduce the risk of overheating which could damage the floor finish. Floor finishes such as wood are sensitive to changes in temperature and have a maximum temperature that they can tolerate.
Installing a floor sensor helps to make the electric underfloor heating system run energy-efficiently reduces energy consumption compared with running the system from just the air sensor in the thermostat.
Simple steps for installing the floor sensor:
Important! Don‘t feed heating cable or cold tail joints into the wall! This will cause overheating and cable failure!
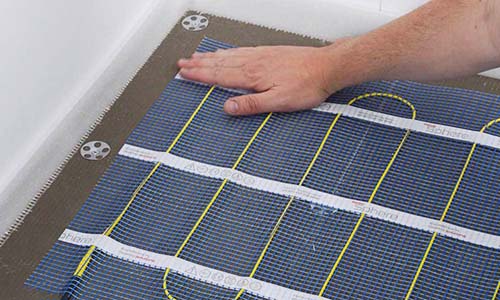
Remove the plastic backing and firmly press the mat into position and repeat until all areas are secure. Make sure to firmly press down the mat to avoid any peeling.
The end termination must be positioned so it can be completely encased in tile adhesive or levelling compound. Remember not to tape over the end termination because it can cause overheating. However, you can tape it down using fibreglass mesh tape to allow the tile adhesive or levelling compound through. You can also use fixing tape around the edges of the mesh mat if needed to secure it further.
Don‘t cover any heating cable with fixing tape! This can cause overheating and cable failure!
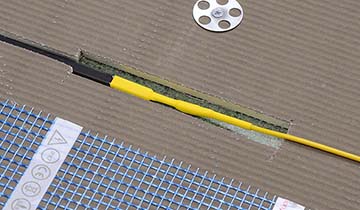
Cold tail joint
When cutting the cold tail joint into the insulation or the floor substrate, don‘t tape over the air void. This can cause overheating and eventually failure at this point. Instead fill the void with self-levelling compound or tile adhesive.
Spare floor sensor
We always recommend to install a spare floor sensor just in case the other fails. This means you’ll have a backup and won’t need to switch to air temperature sensing which is less energy-efficient.
So, simply position the spare floor sensor centrally between two sections of heating cable.
But don‘t lay the floor sensor over heating cables and use fixing tape to secure the spare sensor in place.
Repeat the floor sensor resistance test from stag 4 and record the results and run the same resistance test for the spare floor sensor and record the results.
Tiling directly over the heating mat
Tiling over self-levelling compound
Repeat the heating mat resistance test, heating mat insulation test and the floor sensor resistance test one last time (see step 4). Write down the results as you will need all test results to register the warranty. These final tests are to ensure that no damage has occurred during installation.
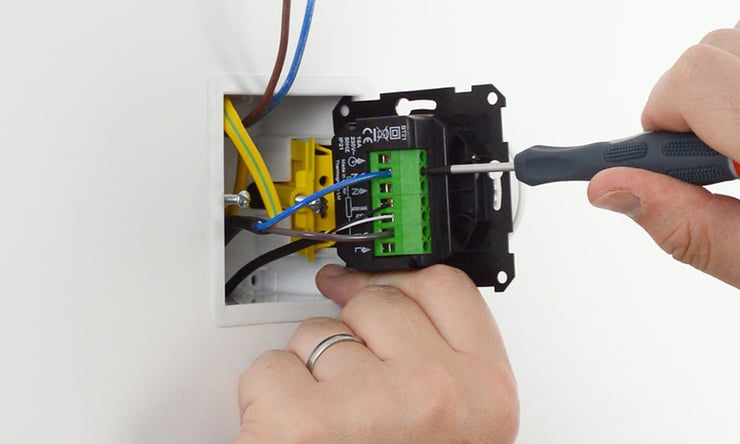
Important! All final electrical connections must be completed by a qualified electrician.
As keen as you may be to turn your new electric underfloor heating system on, you must wait for the tile adhesive and/or self-levelling compound to fully cure before turning it on. The curing process can take between 7-14 days but do check with the manufacturer’s guidelines to make sure.
We recommended to follow this commissioning process:
Finally, increase the temperature by a maximum of 2°C every 24 hours until you reach your desired floor temperature.
That’s it! You are done!
We hope this guide helps you through your electric underfloor heating installation. But, if you do have any questions and need further advice, our team are on stand-by to help. Simply, get in touch.


2 min read
When installing ThermoSphere electric underfloor heating using insulation board will minimise downward heat loss and maximise the efficiency of your...
5 min read
How many installers does it take to test electric underfloor heating? Hopefully, just one! But with so many common mistakes made along the way, we...

6 min read
With the colder months approaching, many of us will be planning to turn the heating on or looking at new ways of heating our rooms cost effectively....
