Thermostat position
Start at the thermostat position. This means you won't have to extend the cold tail to reach the thermostat position.
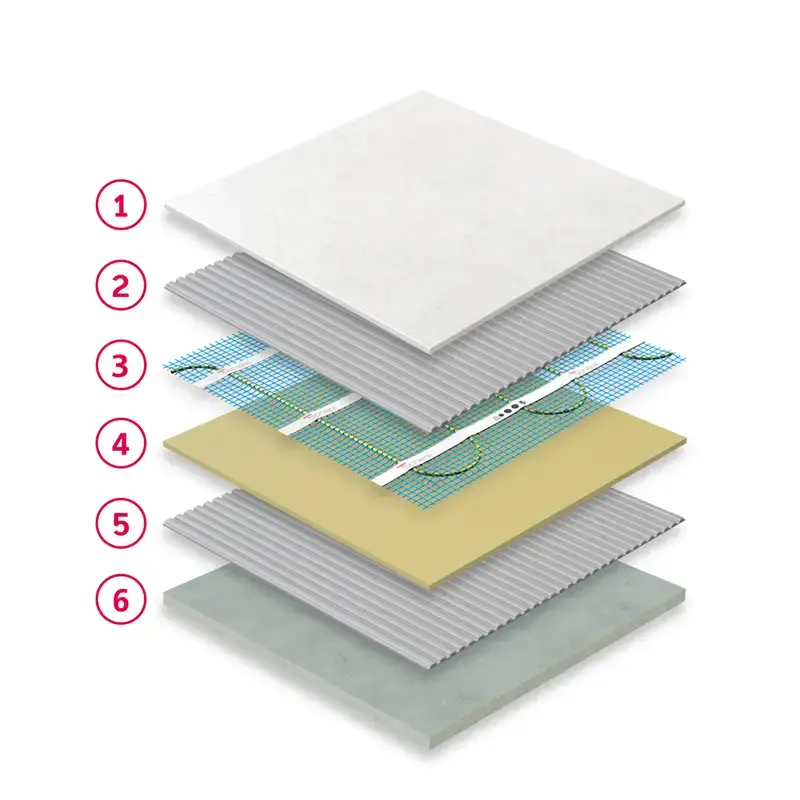
1. Tile
2. Flexible tile adhesive
3. Mesh
4. Uncoated insulation board
5. Flexible tile adhesive
6. Concrete substrate
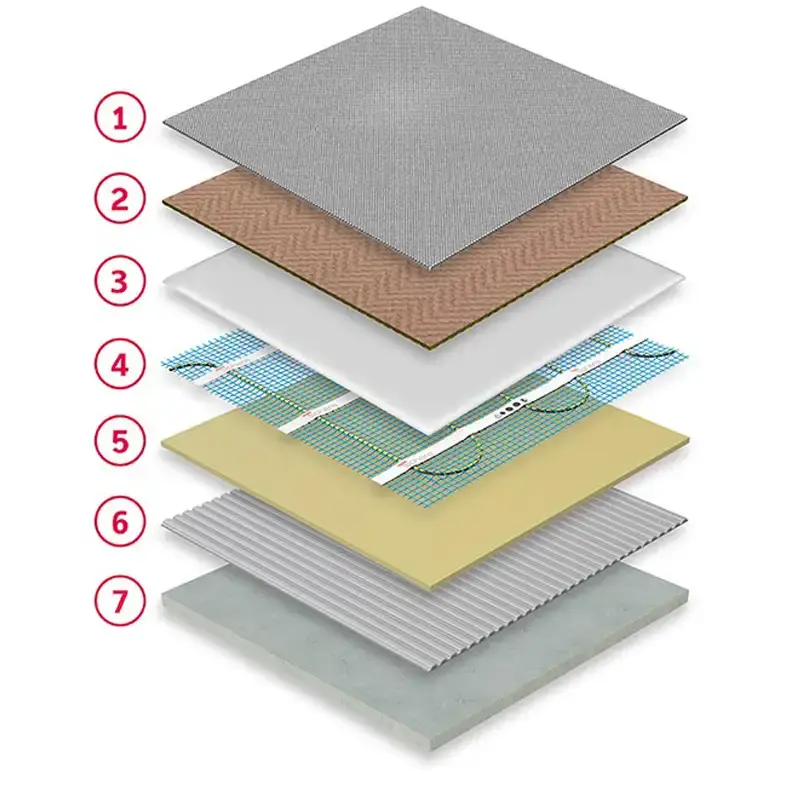
1. Carpet
2. Carpet underlay
3. Flexible self-levelling compound
4. Mesh
5. Uncoated insulation board
6. Flexible tile adhesive
7. Concrete substrate
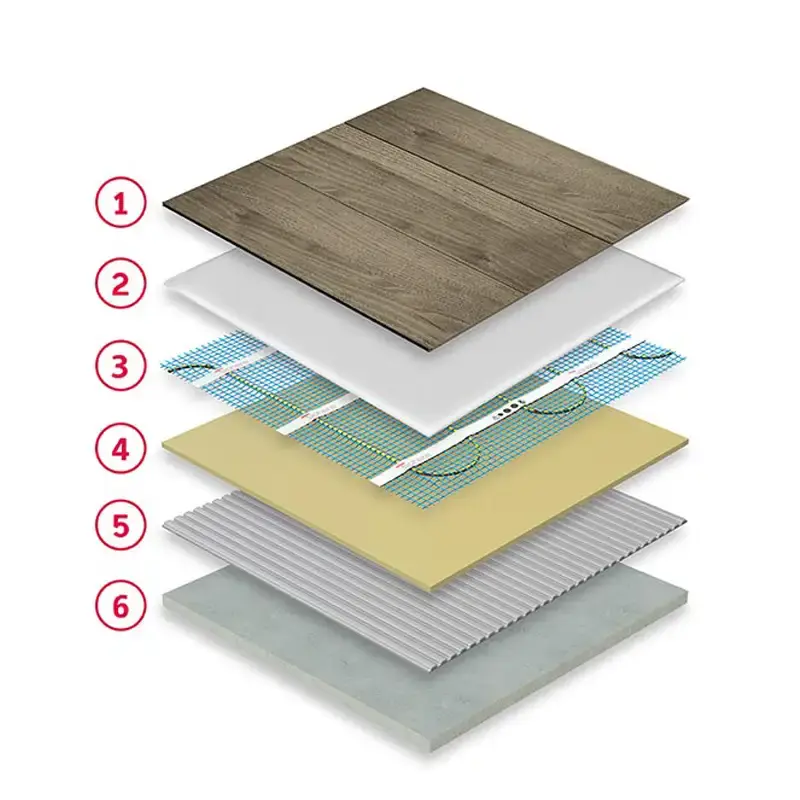
1. Engineered timber
2. Flexible self-levelling compound
3. Mesh
4. Uncoated insulation board
5. Flexible tile adhesive
6. Concrete substrate
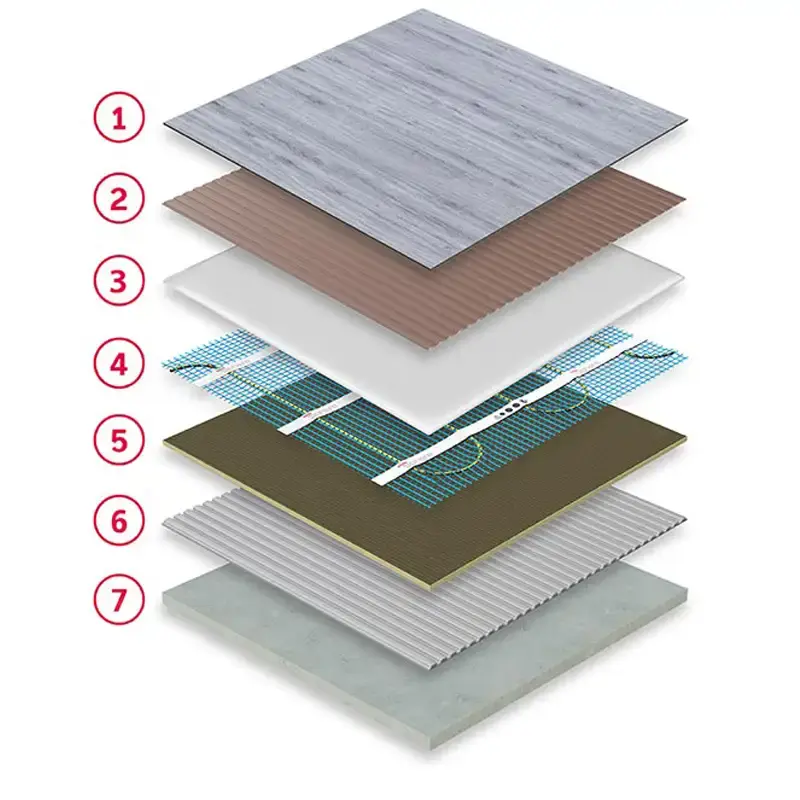
1. Vinyl
2. Acrylic adhesive
3. Flexible self-levelling compound
4. Mesh
5. Coated insulation board
6. Flexible tile adhesive
7. Concrete substrate