 Sam Hills
6 min read
Can you repair electric underfloor heating?
One of the most common fears of underfloor heating is the fear of it ‘going wrong’ or stopping working altogether. “Can electric underfloor heating...

In this first part of our guide ‘Why is my underfloor heating not working?’, we cover; towel test, power, circuit check and sensors. But if it’s thermostat related, read our part 2 of this blog topic.
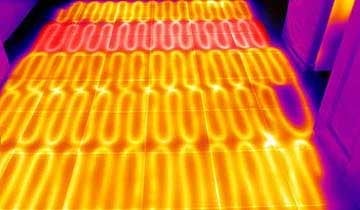
Why is my underfloor heating not working? Sometimes your electric underfloor heating seems like it just will not work and that can be very frustrating, especially if it has always worked before, you’re used to nice warm floors and now for some reason it seems to not be playing ball! Don’t worry though. The most common issues are usually something relatively simple that can be fixed over the phone by one of our friendly and knowledgeable customer experience team.
Our team deal with hundreds of calls a year and we’ve pretty much heard it all from dog beds covering over temperature sensors, heating wired directly to the mains without a thermostat and even insulation board having been installed OVER an underfloor heating system!
This open and honest guide will give you some simple fixes for the most common problems with electric underfloor heating and help to get you nice and warm again.
It is true to say that electric underfloor heating is a very simple heating cable and very rarely goes wrong if it is installed and set up correctly. Most issues that do arise can be narrowed down to settings changes on the thermostat or simple electrical or lifestyle changes.
To bypass any heating schedule settings you can set your thermostat to manual mode to test whether the heating is working quickly and easily. On the programmable thermostat (SCP model) simply press the settings button so that the hand icon shows up on the display. This indicates that the thermostat is on manual mode. In manual mode the thermostat will heat the floor up to your set temperature no matter the time of day, so long as the set temperature is set above the measured temperature of the floor or room.
To do the towel test, grab a large bath towel and fold it up several times. Place this over a section of the floor where you expect there to be heating. Now use the up arrow to set the desired temperature to 30°C. (We say 30°C because this is usually always hotter than the current temperature of the floor but this temperature should only be used for short periods of time during testing and troubleshooting and the maximum floor temperature guidance of 27°C should be followed under normal operation). You should see the flame icon on the screen and hear the thermostat click when it switches the heating on. After about 15 minutes you should feel the floor getting warm under the towel. If you do, you know that your underfloor heating system is all good and working as it should. You can now remove the towel and leave the room to heat up for a while.
A floor in a small room that is insulated should warm up within 30 minutes or so but if there is no insulation or if it is the first time the heating has been switched on it can take longer. Leave the floor for a couple of hours and come back. If the floor is warm you’re all good. If not, you may have a heat loss issue. In this situation it is best to speak to your installer to find out what electric underfloor heating system was laid, what the original sub floor was and whether any insulation was installed before the heating was put down. Once you have that information you can give us a call and we will be able to advise whether there is likely to be a heat loss issue.
Unfortunately, if there is a heat loss issue there is not much you can do to fix it other than install a supplementary heater or remove the floor and heating system and start again, but this time include substrate insulation and possibly a higher output heating system if required. To help avoid this problem as much as possible, ThermoSphere always include insulation in every quote. Insulation board is recommended to prevent downward heat loss, speed up heating times and improve the efficiency of your underfloor heating system, it is often the first thing to be taken out of a project to “save money” but this is not the case because in the long run an uninsulated system will cost you more to run and you may even end up having to pay to replace it altogether if there is a heat loss issue!
If your underfloor heating is not heating up and there is no sign of life on the thermostat then you need to check the electrical supply. One of the most common reasons for electric underfloor heating not working is that somebody has switched off the fused spur that supplies the underfloor heating with power!
Sometimes people decide to do this over the warmer months of the year and then when September and October come around, there is no heat coming from the floor! If there is one, check that the fused spur is switched on and also check that the relevant mini circuit breaker (MCB) in your consumer unit has not tripped or been switched off. If either or both of these switches are off then your underfloor heating has no power and won’t come on. Switch them both back on and you should see your thermostat come to life and be able to turn your underfloor heating on again. If this doesn’t work, the fuse in the spur may need replacing or you may need to ask an electrician or competent person to check the wiring for you.
If the electric circuit in your house trips every time your electric underfloor heating switches on, then you may have one of two common problems.
The first thing you should check is whether the underfloor heating works by itself. First, switch off the circuit that supplies you underfloor heating. Then identify every electrical device that is connected to the circuit and make sure they are all switched off at the power. Now switch the power to the circuit back on, and only turn your underfloor heating on, in manual mode, and set the temperature to 27°C. If the heating comes on, nothing trips and the floor starts to warm up after about 10-15 minutes, then you know the heating element, thermostat and wiring are OK. Good news!
Residual Current Device (RCD) trips
If the RCD trips even with everything else switched off, you could have what’s known as a ‘leak to earth’ somewhere on the underfloor heating circuit. This will need to be investigated by an electrician, who will carry out an insulation resistance test on the cables to troubleshoot the problem.
If the RCD doesn’t trip when the underfloor heating comes on, start switching each of the other appliances powered by the circuit on one-by-one. If the RCD trips when you switch something on, you probably have an issue with that device and you should contact an electrician.
Mini Circuit Breaker (MCB) trips
If the MCB in your distribution board trips when the electric underfloor heating is switched on, you may have an overcurrent or overloading issue.
Now switch on the other appliances one by one. If the MCB trips you may have an overloading problem on the circuit. To figure this out you need to know the maximum load of the circuit that your electric underfloor heating is connected to, and the total load of your electric underfloor heating system.
The total load of the underfloor heating circuit, and any other connected appliances if it is not a dedicated circuit, must be lower than the maximum load capacity of the circuit, or the MCB will trip when the maximum load is exceeded.
If you have a smaller electric underfloor heating system that is connected to an existing circuit via a fused spur, the total load of the electric underfloor heating must not exceed the safe, available load on that circuit.
You also need to consider the total load of your thermostat. Most electric underfloor heating thermostats can switch electrical loads up to 16 Amps. If you are intending to switch a 16 Amp system through a single thermostat you need to make sure that the supply circuit can safely handle 16 Amps of load. If you try to switch more than 16 Amps, the thermostat can develop issues and, if you exceed the maximum load of the MCB, the MCB will trip as a failsafe and switch the circuit off.
The 16 Amp load limit also means that there is a maximum floor area that you can control with one thermostat. For example, if you have a 100W/m2 heating system you can heat up to 36m2 on a single 16 Amp thermostat. At 150W/m2 you can heat up to 24m2, and with a 200W/m2 system you can heat up to 18m2 per thermostat.
If you suspect that the total current load of your electric underfloor heating system is greater than the maximum load of the existing supply circuit, you will need to ask an electrician to come and investigate. The solution to this is to have the electrician install a dedicated power supply for your underfloor heating.
Always contact an electrician!
As with all household electrics, it is safest to employ the services of a skilled professional electrician rather than attempting to troubleshoot and rectify issues yourself. The information in this article is intended for educational and information purposes only and any electrical work is undertaken at your own risk. Always ask an electrician!
If you have ruled out overloading and your electric underfloor heating system is relatively small (less than 20m2), there might be some damage to your floor heating cable that is causing what is called a “leak to earth”.
This occurs when the insulation around an electrical cable is damaged, and the electricity is conducted by the earth cable and detected by the RCD. For safety, as soon as this happens the RCD switches off the power to the circuit – that is what it is there for! If this happens with your electric underfloor heating system it can usually be fixed without too much disruption, so don’t worry. It is always a good idea to verify that there is a leak to earth before booking a repair engineer. This can be done by an electrician, and they will need an insulation tester. Here’s our video that shows how to do an insulation test on an electric underfloor heating system.
If the test shows that there is a leak to earth the next stage is to book a visit from a specialist repair engineer. They will come out to your house and use their equipment to locate the affected section of cable. The bad news is that they will have to take up a small section of the floor to inspect the damage and carry out the repair. The equipment they use can pin-point the damage within an area the size of a £2 coin, so usually only one tile needs to come up.
Once the cable is repaired, tested, and working again you can have a replacement tile laid to make the floor good again. The cost of the repair will be covered under the ThermoSphere Lifetime Warranty if the fault is found to be a manufacturing or material defect. So, don’t forget to register your warranty! If the fault was caused because of damage during installation or an error of some kind then the visit is chargeable and usually costs between £200 – £400 depending on the company you use, your location, the complexity of the repair and the time of year. ThermoSphere do not have repair engineers and we do not profit from repairs or service visits at all. We can recommend a repair company to you if you ever find yourself in need.
A resistance test can be carried out on your underfloor heating system to check that the heating cables are ok and have not been cut short, extended or damaged. Each heating cable is manufactured with a specific resistance value that is designed to provide the right heat output. If the cable length is changed, the resistance value changes which will have an adverse effect on the performance of the heating system.
To test the resistance you need to know which heating mat or cable was installed and what the expected resistance value is. You will find the resistance value on the packaging label, the cold tail label and detailed on the test label in the instruction guide which should have been given to the home-owner as part of the warranty handover. If you don’t have a record of the resistance value we can usually work out which product was installed by looking at invoices, plans or purchase receipts. With this information we can tell what the resistance should be.
Once you know the expected resistance value you can compare that with the tested values. To test the resistance you will need to isolate the electrical supply, remove the thermostat from the wall and remove the live and neutral heating cables from their terminals. Connect each cable to a clip on your test meter and set the meter to the correct ohms setting. For resistance values under 200 Ohms you can use the 200 Ohms setting. If you’re expecting a reading more than 200 Ohms, you’ll need to use the 2000 ohms setting. Some meters have different settings our auto-ranging features so if you are in doubt, refer to the meter instructions and use the setting that corresponds to your expected resistance value.
The measured resistance should be within -5 to +10% of the factory values. If it is, you’re all good. If not, you’ll need to investigate further as you may not have the right information about your heating system or the cable may have been cut or extended and need a repair visit. Give us a call for advice or read on!
Learn more about testing a system
As you now know, your underfloor heating won’t come on unless the measured temperature drops below the desired set temperature. Most people tend to have their underfloor heating thermostats set to floor temperature sensing and have a floor temperature sensor somewhere under the floor. The job of that sensor is to measure the floor temperature and tell the thermostat when to switch on and off.
Sometimes the floor temperature sensor is not installed in the best place and other temperature influences can affect it. For example if the floor sensor is in an area that is covered by an insulating material such as a mat, rug or dog bed, that area of the floor will heat up much, much faster than the rest of the floor and as a result the sensor will think the whole floor is at temperature and switch off the heating before the rest of the floor has had a chance to warm up. Simply moving the insulating object will allow the floor sensor to read a more accurate temperature for the whole floor and the result will be a warmer more comfortable room.
It is important not to cover a heated floor with anything too thick (that insulates more that 2.5TOG) because it does not allow the heat to be conducted way from the cables and into the floor ad can result in overheating issues and cable failures. If you need to have something like a dog bed in the room you should get one that has small feet or legs that lets air circulate. Rugs and mats are not recommended on heated floors.
The temperature sensor is one of the most important components of an electric underfloor heating system because it dictates when the heating should be on or off. If your heating is not working you should check the temperature sensors are ok.
The ambient temperature sensor is located on the underside of the thermostat display. It looks like a small black bead. Check that the sensor has not been covered, damaged or pushed into the thermostat.
If it has, contact us and we will help you to find out whether it can be fixed. If you need a replacement thermostat we can arrange that for you too.

You will also need to check the floor temperature sensor if your system is using one. Even though the floor sensor will be under the floor (we hope!) you can still check whether it is working or not and, in some cases, they can even be replaced. You should only really attempt this if you are competent with electrics and have a multi-meter. Isolate the electrical supply before you start!
Pop the display off the mounting plate and undo the mounting screws to release the thermostat from the wall. Loosen the sensor terminals and remove the wires. Use the clip leads on your test meter and clip one to each of the sensor wires (there is no polarity). Turn your meter on and switch it to resistance setting 20K Ohms. ThermoSphere temperature sensors are rated at 10K Ohms at 25°C so you should normally get a resistance reading between 8-12K Ohms if the sensor is one of ours and has not been damaged. If you get a different resistance reading then you may have an incompatible sensor installed. If there is no resistance reading then the sensor has been damaged.
In both of these scenarios the ideal solution is to remove the floor sensor and install a new compatible one. This will not be possible if a sensor conduit has not been uses but luckily there are some other options! If the thermostat is in the same room as the heating then you can switch it to use the ambient air temperature sensor instead. This is OK for tiled floors but may not be suitable of you have other floor coverings such as vinyl that have definite maximum temperatures.
In this situation you are best advised to replace the thermostat for one that is compatible with a wireless temperature sensor such as the Bluetooth programmable thermostat (BT21). With this thermostat you can also buy and install a wireless battery-operated temperature sensor. This can be placed at a low level or even on the floor and will help to limit the floor temperature. The BT21 with wireless sensor is also ideal for measuring the ambient temperature in the heated room if your thermostat cannot be located in the same room.
Wow that was a lot of information! I hope Part 1 of ‘Why is my underfloor heating not working’ article has helped to explain a few things you may not have known about electric underfloor heating. As you now know, most of the problems that can arise can be fixed relatively easily of you have some basic electrical knowledge or a friendly electrician!
As always, if you have any questions or would like to talk about your specific installation you can contact our customer experience team who will be happy to help you!
Read the next instalment…Why is my underfloor heating not working? Top troubleshooting tips (Part 2)
6 min read
One of the most common fears of underfloor heating is the fear of it ‘going wrong’ or stopping working altogether. “Can electric underfloor heating...

9 min read
In the UK we are becoming increasingly conscious of the rising cost of energy and the impact that heating our homes has on the environment. Electric...

9 min read
When it comes to building or even renovating, you only want to do it once, or it becomes a very costly exercise. And while most homeowners like to...